4.4 KiB
| title | author | slug | date | publishdate | description | tags | ||||
|---|---|---|---|---|---|---|---|---|---|---|
| Wiring 2 Unifi G4 doorbells, with official diagram! | Andrew Gioia | doorbells | 2020-10-05 | 2020-10-05 | Against all odds I successfully installed 2 Unifi G4 Doorbells, replete with an official wiring diagram from Ubiquiti! Hopefully this can help others in their networks. |
|
I was incredibly excited when Ubiquiti announced the G4 Doorbell in their Unifi Protect line earlier this year. I finally got my hands on one last month and installed it, and then immediately (and unsurprisingly) wanted to replace the back doorbell too.
Unfortunately two doorbells didn't appear to be officially supported and given my very basic electrical knowledge, I frustratingly failed while trying to use Nest's diagram and some advice from the community. I finally got an official wiring layout from Ubiquiti Support this weekend though and installed the second one!
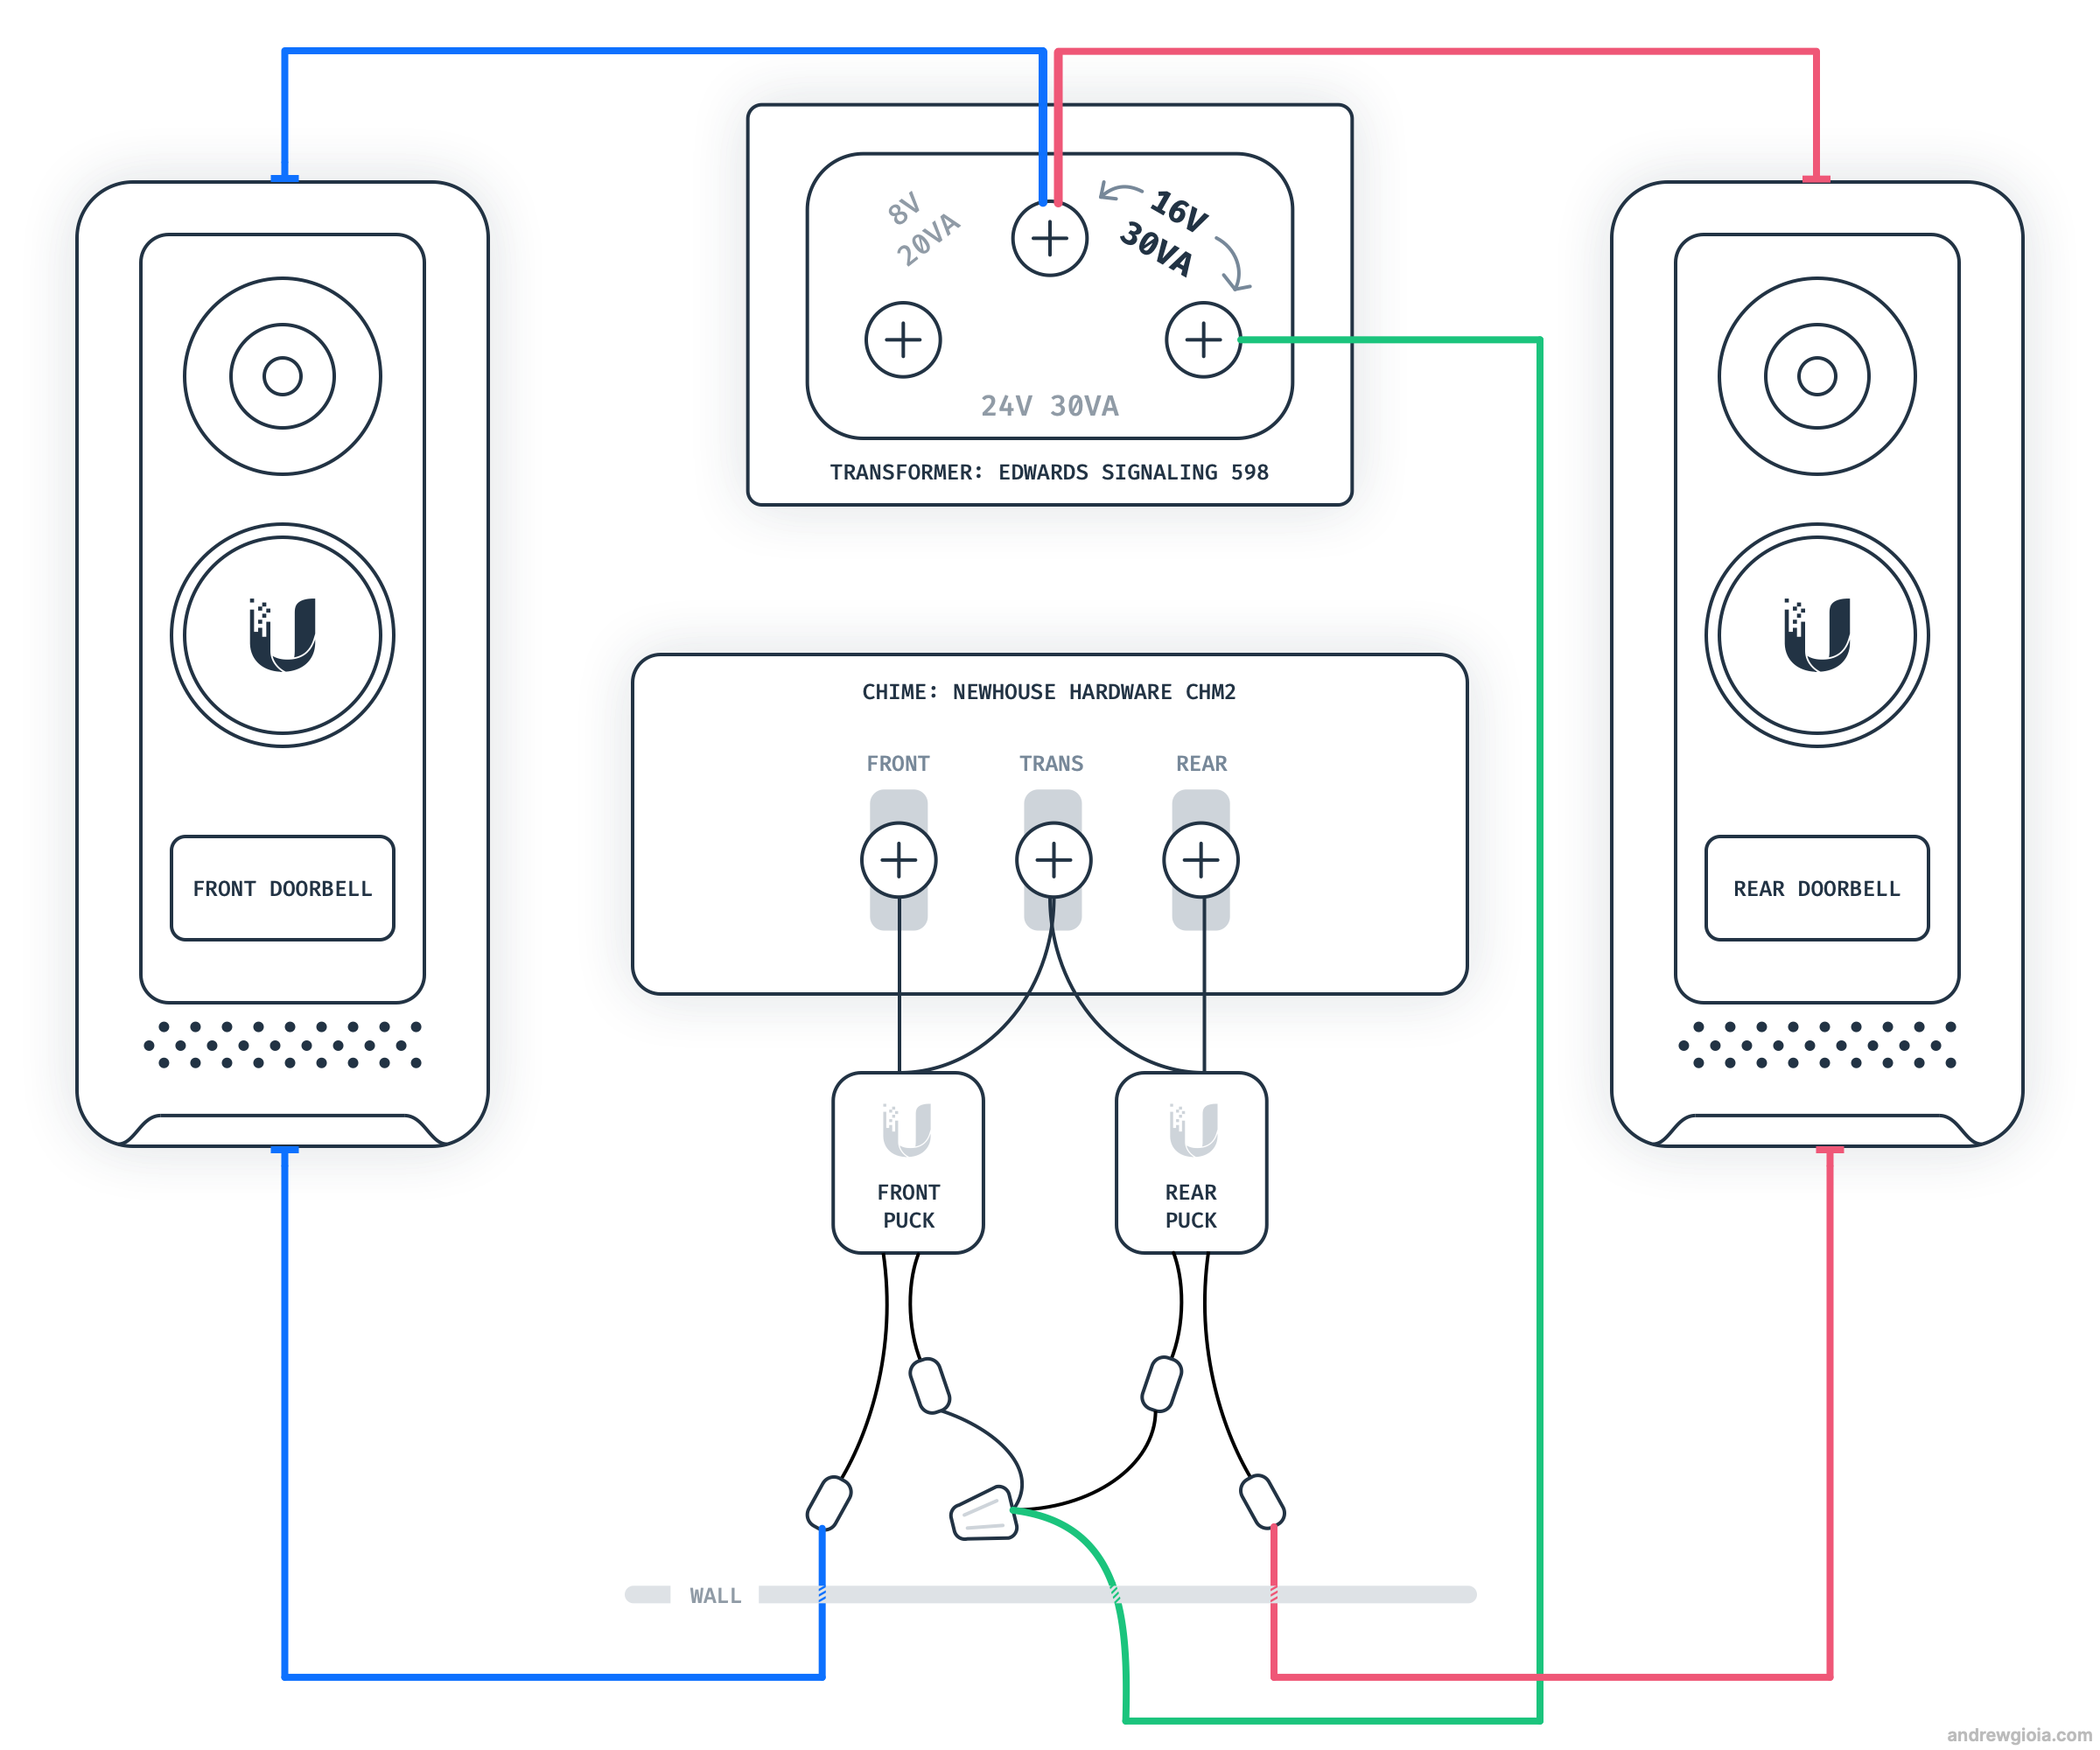
Here it is, redrawn for clarity and to identify the other components that I'm using in case you're looking to replicate this:
{{< picture source="https://media.gioia.cloud/blog/thoughts/doorbells/unifi-doorbell-wiring-diagram@light.png" dark="https://media.gioia.cloud/blog/thoughts/doorbells/unifi-doorbell-wiring-diagram@dark.png" alt="Unifi G4 Doorbell wiring diagram for two doorbells" title="Wiring diagram for 2 Unifi G4 doorbells, redrawn from the official diagram provided by Ubiquiti support in October 2020." caption="Wiring diagram for 2 Unifi G4 doorbells, redrawn from the official diagram provided by Ubiquiti support in October 2020." >}}
It's not very complicated but I have some recommended hardware and there are a few key points to keep in mind when setting this up:
-
You need at least a 16V/30VAC transformer. Ubiquiti (and Nest and Ring) recommend this for just one doorbell and it's absolutely required to ensure enough power to both of them. Most commonly the default transformer in our homes is going to be less than 30VAC so you'll probably need to replace this. I replaced mine in around 30 minutes (shut the power off!) with the 598 transformer by Edwards Signaling.
-
The two pucks need to be wired to the transformer. You'll most likely have 3 low-voltage wires coming into your doorbell chime: one from the front doorbell, one from the rear, and one from the transformer. The G4 Doorbells come with a "puck" that sits between these wires and the chime's terminals to ensure the doorbells always have enough power to stay on. In a two-doorbell install, one of the female connectors from each puck needs to be connected to the transformer wire coming in. I just cut two pieces of 18 guage wire and used a wire nut.
-
Completing the wiring description: The other female end of front puck connects to the front wire coming to the chime, and its two male ends connect to the front and transformer terminals on the chime. The other female end of the rear puck connects to the rear wire coming in to the chime, and then its two male ends connect to the rear and transformer terminals. Just to reiterate: you'll have two of these pronged ends connecting to the transformer terminal on the chime (often labeled "trans" on it).
-
Any 16V chime should work: But I used the CHM2 by Newhouse Hardware, mostly because it was the only 16V chime I could find and it had a plain white exterior. The wiring is very tight inside this chime and the cover is very hard to remove. You need to be careful not to let one of the pucks come in contact with the mechanical doorbells or else it won't ding (or loudly). I plan to build a small oak box to replace the white cover to 1. look better and 2. provide more room in there for the wires/pucks.
Good luck on the install! The doorbells have been fantastic so far and while I did need to add a new wireless access point outside on the front of the house, their connection since then has been great. Before I put that AP in I was consistently getting disconnects on the front doorbell; we live in a 120 year old home and the walls are crazy thick. I had kind of planned on getting this new AP anyway and this was just enough rationalization to get it 😛.